By Ruairi O'Shea
Former Investigative Writer | Kaituhi Mātoro
Easter chocolate can cost more than twice as much as the same chocolate in bar form. So why not buy a bar and make your own egg?
You might think that making an Easter egg is too hard, too time-consuming or requires too much specialist equipment.
Well, I’m here to tell you I’ve made my own Easter egg. It’s achievable, it’s enjoyable, and it is so much more satisfying to eat than a store-bought egg.
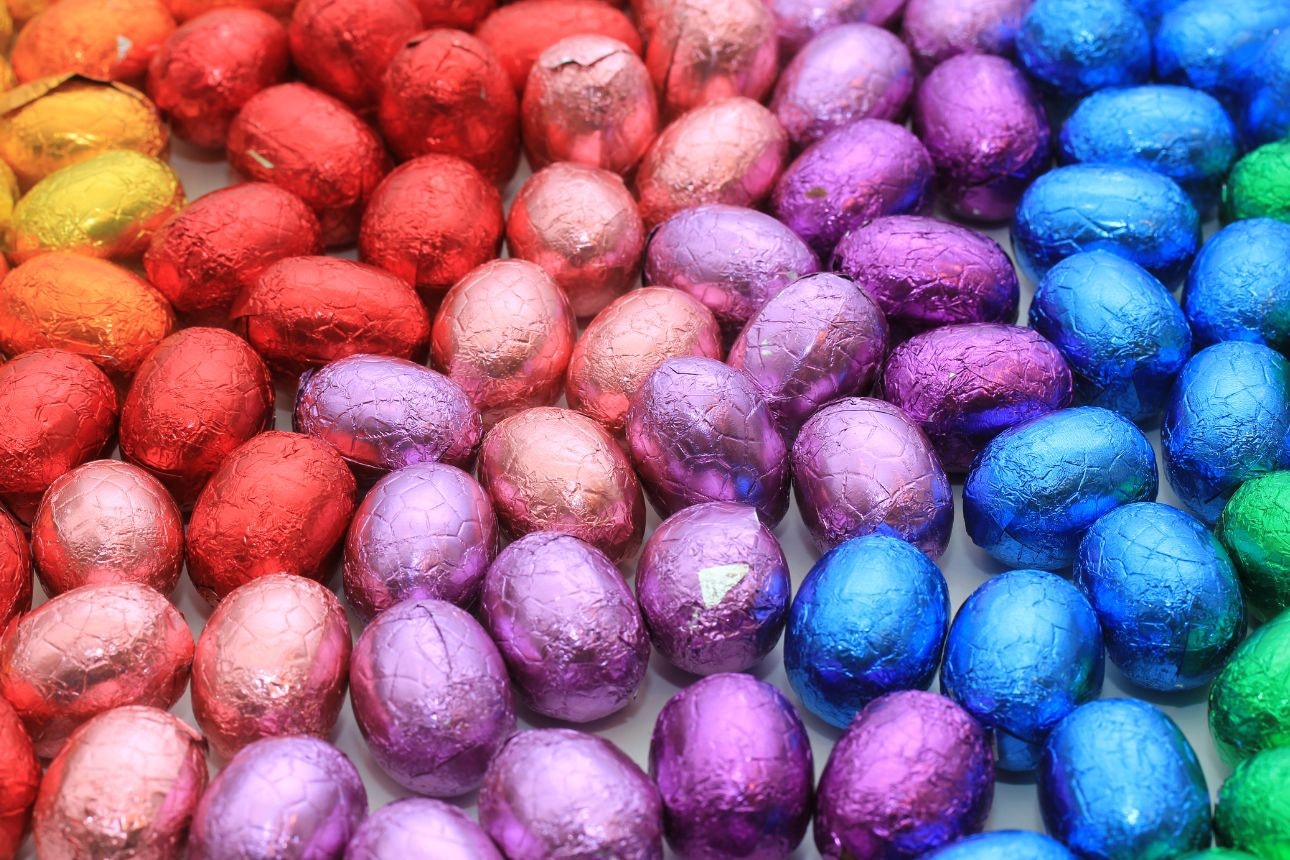
Last week, we looked at the huge difference in price between blocks of chocolate and a range of Easter eggs, bunnies and gift boxes available at supermarkets. The chocolate manufacturers told us that Easter chocolate was so much more expensive because of the limited size of production runs, the processes involved in making shaped chocolate, and the cost of packaging and transporting these fragile treats.
We know that chocolate eggs are part of the fun of Easter, but with so much of the cost of an Easter egg bound up in logistics, is it cheaper – or just better – to do it yourself? I wanted to find out.
The verdict
The simple answer is that, if you only want one Easter egg, making it yourself is probably going to be more expensive than buying one.
I spent $20.30 on an Easter egg mould and shipping. My mould had 500g written on it, so I bought two 250g blocks of chocolate, spending $12.58. This came to $32.88, all up.
However, in practice, my mould only held 300g, so I could have gotten away with using less chocolate. If I’d only melted the amount I needed, my chocolate costs would have been $7.55, and my total costs $27.85.
Also, you only need to buy a mould once. So, while my first Easter egg cost $27.85 to produce, each subsequent egg will only cost about $7.50, chocolate-wise. If you make four eggs, it comes to $12.63 per egg, including the price of the mould.
If you make multiple eggs for your family or create a new tradition of making your family’s Easter eggs, before long, it will be cheaper than buying them in store.
However, there’s more to it than money. If you make your own egg, you can choose whatever chocolate, or fill the egg, with whatever you like. I learned a lot about the chemistry of chocolate and was more mindful of what had gone into the finished product when I ate it. Most importantly, even as a total amateur, I really enjoyed the whole process.
I’d do it again.
How to make your own Easter egg
I had an Easter egg mould but knew almost nothing about how best to produce the actual egg, so I got in touch with the experts at Wellington Chocolate Factory. Their co-founder, Gabe Davidson, gave me some tips for making your own egg.
First, I’d need to use high-quality chocolate containing cocoa butter and cocoa solids, not compound chocolate. Compound chocolate replaces cocoa butter with less expensive fats, such as palm or coconut oil, and has a chemical structure less suited to the moulding process. (Cooking chocolate is often compound chocolate – check the pack.) Gabe also told me that a higher cocoa content – between 60% and 70% – would create a richer-tasting egg.
Finally, he told me that tempering the chocolate was essential. Tempering is the process of slowly heating and cooling the chocolate in a way that helps to control its crystalline structure. I’d watched enough Great British Bake Off to be wary of tempering chocolate, but I’d come too far to ignore Gabe’s advice.
What you'll need
To make your own egg, you’ll need some basic kitchen items: a pot, a bowl and a spatula.
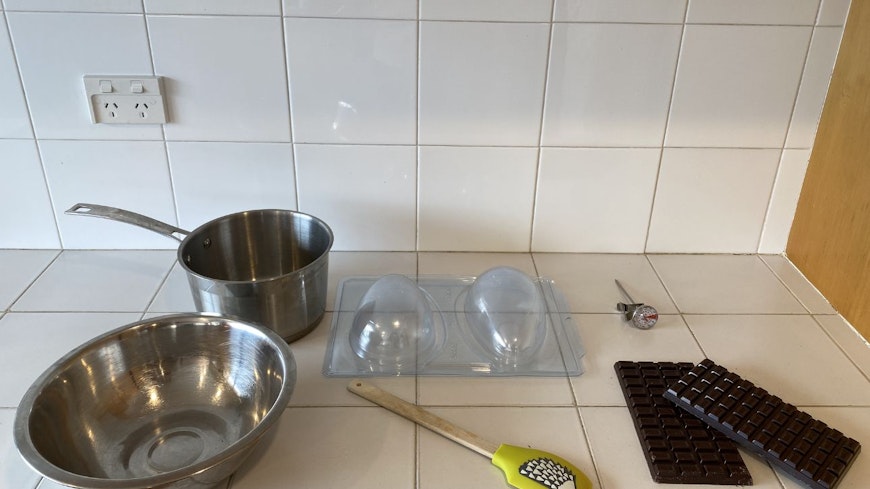
You’ll also need a thermometer. I used a milk-frothing thermometer, but if you’ve got a meat thermometer that should work too.
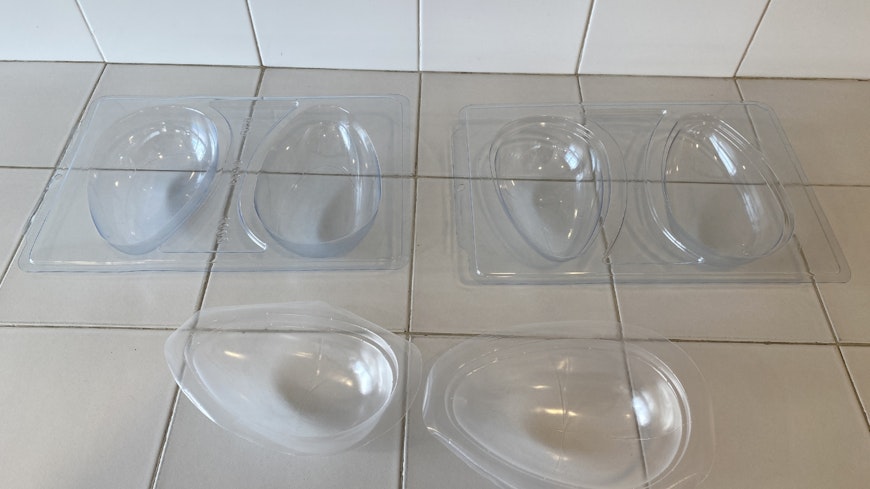
You’ll definitely need an Easter egg mould. I went for this one from Cake Warehouse. Finding a mould for a classic Easter egg is harder than you might think. Look for moulds that come in four parts, which ensures the egg will be hollow.
Finally, you’ll need chocolate. I bought two blocks of Whittaker’s Dark Cacao chocolate, with 62% cocoa and that contained both cocoa butter and cocoa solids.
Tempering the chocolate
Like most aspects of chemistry, tempering chocolate is something that I don’t really understand, but that I abide by the laws of.
When we temper chocolate, we manipulate its crystal structure. Un-tempered chocolate will look dull and bend rather than break. Tempered chocolate is glossy and breaks cleanly when snapped. To achieve this effect, we need to control the chocolate’s temperature both as it heats up, and as it cools.
Gabe gives me simple, useful instructions for this process.
“Don’t allow the chocolate to reach a temperature higher than 45 degrees Celsius for milk chocolate, or 50 degrees for dark chocolate.”
“To ensure the crystals form correctly, you need to agitate your chocolate as it melts and cools – keep stirring.”
To do this, just place a bowl of chocolate over a pot of gently steaming water, then stir constantly while regularly checking the temperature. Once the chocolate hits your desired temperature, remove it from the heat and stir it as it cools. Gabe tells me to pour my chocolate into the mould when it reaches 29 degrees Celsius.
Making the egg
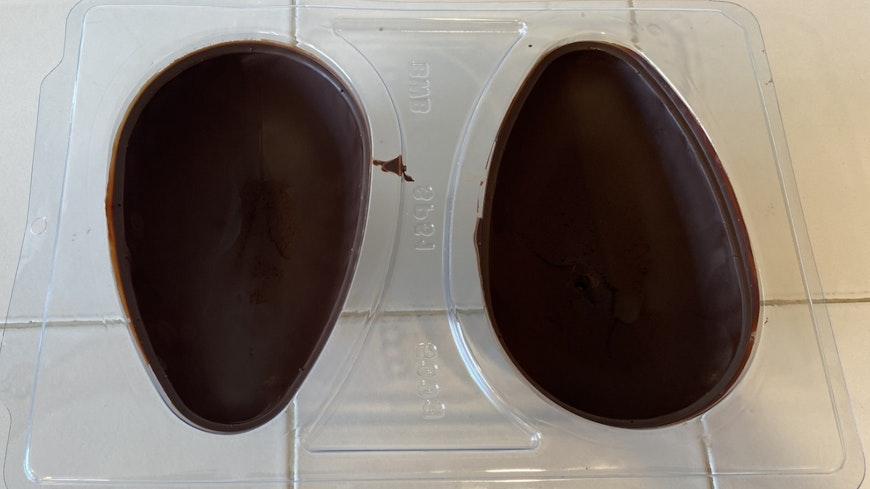
My mould came in four parts. Two plastic sheets, each with two egg-shaped indentations, and two silicon inserts.
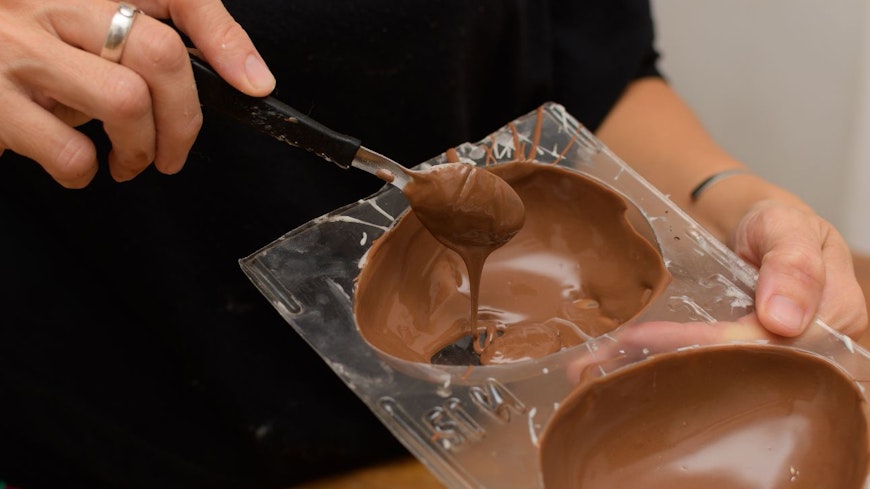
One plastic sheet has a fill line within the egg shapes. Pour the chocolate up to the fill line within the two egg-shaped indentations. While my mould said it was 500g, in reality it took only 300g of chocolate to reach the fill line.
I reserved some of the chocolate to glue the two sides of the egg together and spread the rest on a baking sheet to cool. I ended up with about 200g of wafer-thin dark chocolate left over, which my household agreed, was nicer to eat than the chocolate in block form.
Next, place the silicon insert on top of the chocolate in the mould and push down gently. Then take the other plastic sheet and place it into the silicon inserts and push down evenly to fill the mould. You should have something that looks like the image below. When you do, turn it upside down and put it in the fridge.
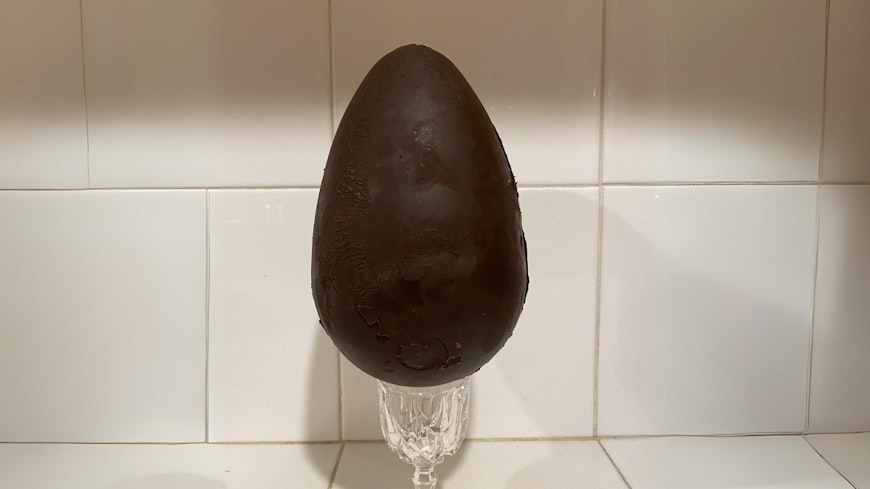
This is where things went slightly wrong for me. The instructions on my mould told me to wait 11 minutes before removing the egg from the mould. In hindsight, this was not long enough, as it wrecked much of the shiny finish I’d achieved.
After a few minutes of battling with chocolate that was still slightly malleable, I put the egg in the freezer to speed up the process. Five minutes later my egg popped out easily. Finally, I used some of the remaining chocolate to glue the two sides together and voila! I’d made my own Easter egg.
Are meal kits cheaper than the supermarket?
We compared three meal kit delivery services with the supermarket to see which is cheaper.